GitHub Actions short background
You can create actions by writing custom code that interacts with your repository in any way you’d like, including integrating with GitHub’s APIs and any publicly available third-party API. For example, an action can publish npm modules, send SMS alerts when urgent issues are created, or deploy production-ready code.
You can build Docker container and JavaScript actions or Composite run steps.
Docker container actions Docker containers package the environment with the GitHub Actions code.
JavaScript actions JavaScript actions can run directly on a runner machine, and separate the action code from the environment used to run the code.
Composite run steps actions A composite run steps action allows you to combine multiple workflow run steps within one action.
Actions require a metadata file to define the inputs, outputs, and main entry point for your action. The metadata filename must be either action.yml or action.yaml.
To ensure your JavaScript actions are compatible with all GitHub-hosted runners (Ubuntu, Windows, and macOS), the packaged JavaScript code you write should be pure JavaScript and not rely on other binaries. JavaScript actions run directly on the runner and use binaries that already exist in the virtual environment.
I’m going to write how to create and use the packaged JavaScript action using the basic components.
How to write a GitHub Action using JavaScript
Prerequisits
- Node.js - should be installed
- Existing repo - existing repo in github
- Npm init -y - package.json existing locally.
Creating an action metadata file
more info can be found here creating-actions
This file defines what are the inputs your actoin can take or requires and what is the output of the action. This should be saved in the root.
name: 'Action Name' #*

description: 'short desc' #*

inputs:

  who-to-greet:  # id of input *

    description: 'Who to greet' #*

    required: true #*

    default: 'World'

outputs:

  time: # id of output #*

    description: 'The time we greeted you' #*

runs: #* Configures the path to the action's code and the application used to execute the code.

  using: 'node12' #* application used to execute the code

  main: 'index.js' #* file that contains the action code
Can have pre, post , pre-if
GitHub provides a actions toolkit , which are node.js packages to allow quickly bulid a JS actions with more consistency
The toolkit @actions/core package provides an interface to the workflow commands, input and output variables, exit statuses, and debug messages.
The toolkit also offers a @actions/github package that returns an authenticated Octokit REST client and access to GitHub Actions contexts.
The toolkit offers more than the core and github packages. For more information, see the actions/toolkit repository.
Our example action.yml file will look like this:
name: 'Hello Teams' #*

description: 'will send an hello world' #*

inputs:

  msg-to-teams:  # id of input *

    description: 'Message to teams' #*

    required: true #*

    default: 'Hi From GitHub'

outputs:

  time: # id of output #*

    description: 'The time we greeted you' #*

runs: #* Configures the path to the action's code and the application used to execute the code.

  using: 'node12' #* application used to execute the code

  main: 'index.js' #* file that contains the action code
Creating the action
- First lets open Vs Code and then we are going to install two packages using npm.
npm install @actions/core
npm install @actions/github- Now we are ready to write some action code. Create an index.js_ file to the root where the __action.yml is.
const core = require('@actions/core');
const github = require('@actions/github');
const axios = require('axios');

try {
    e = process.env;
    config = {
        webHookUrl: e.TEAMS_WEBHOOK,
    }
    if (!config.webHookUrl) {
        Core.setFailed("TEAMS_WEBHOOK is not set. Set it with\nenv:\n\TEAMS_WEBHOOK: $\n");
    }

    const msgToTeams = core.getInput('msg-to-teams');
    console.log(`${msgToTeams}!`);

    axios
        .post(`${config.webHookUrl}`, {
            text: `${msgToTeams}`
        })
        .then(res => {
            console.log(`statusCode: ${res.statusCode}`)
            console.log(res)
        })
        .catch(error => {
            console.error(error)
        })

    const time = (new Date()).toTimeString();
    core.setOutput("time", time);
    const payload = JSON.stringify(github.context.payload, undefined, 2)
    console.log(`The event payload: ${payload}`);

} catch (error) {
    core.setFailed(error.message);
}
GitHub Actions provide context information about the webhook event, Git refs, workflow, action, and the person who triggered the workflow. To access the context information, you can use the github package.
To see more about setting exit codes for actions
Creating a README file
A good practise is to have it to specify the following info;
- A detailed description of what the action does.
- Required input and output arguments.
- Optional input and output arguments.
- Secrets the action uses.
- Environment variables the action uses.
- An example of how to use your action in a workflow.
an Exmaple README file:
# Hello world javascript action


This action prints "Hello World" or "Hello" + the name of a person to greet to the log.

## Inputs


### `msg-to-Teams`


**Required** Message to Teams. Default `"Hi From GitHub"`.

## Outputs


### `time`


The time we greeted you.
Example usage
{% highlight yml %}
- name: Hello world action step uses: madkoo/demo-js-action@v1 id: hello with: who-to-greet: ‘Hi from GitHub’ env: TEAMS_WEBHOOK: ${{ secrets.TEAMS_WEBHOOK }} # required
{% endhighlight %}
Commit, tag and push
GitHub downloads each action run in a workflow during runtime and executes it as a complete package of code before you can use workflow commands like run to interact with the runner machine. This means you must include any package dependencies required to run the JavaScript code.
From your terminal, commit your action.yml, index.js, node_modules, package.json, package-lock.json, and README.md files. If you added a .gitignore file that lists node_modules, you’ll need to remove that line to commit the node_modules directory.
git add action.yml index.js node_modules/* package.json package-lock.json README.md
git commit -m "Created my first action"
git tag -a -m "Giving my first action a version" v1
git push --follow-tags
It’s best practice to also add a version tag for releases of your action. For more information on versioning your action, see About actions
As an alternative to checking in your node_modules directory you can use a tool called vercel/ncc to compile your code and modules into one file used for distribution.
When using the vercel/ncc there are some extra stpes that need to taken.
- Install the package with npm:
npm i -g @vercel/ncc- Build your JavaScript file.
ncc build index.js --license licenses.txt- Now you need to change the main keyword in your action.yml file to use the new dist/index.js file that the ncc pakcage created.
main: 'dist/index.js'- now instead of checking in the node_modules folder you just need to check in the dist/* folder
Testing the action out
Now the only thing left to do is to go back to Github.com and to your repository.
-
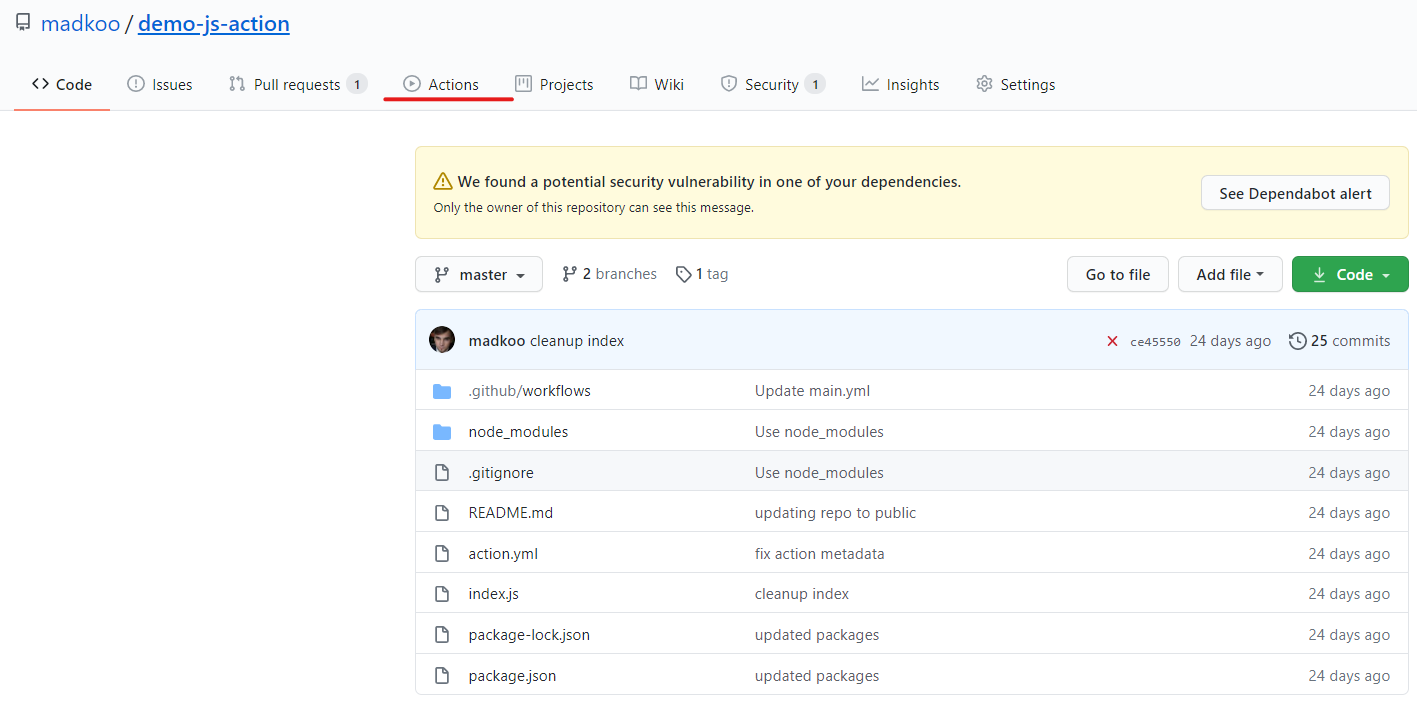
Click on Actions

-
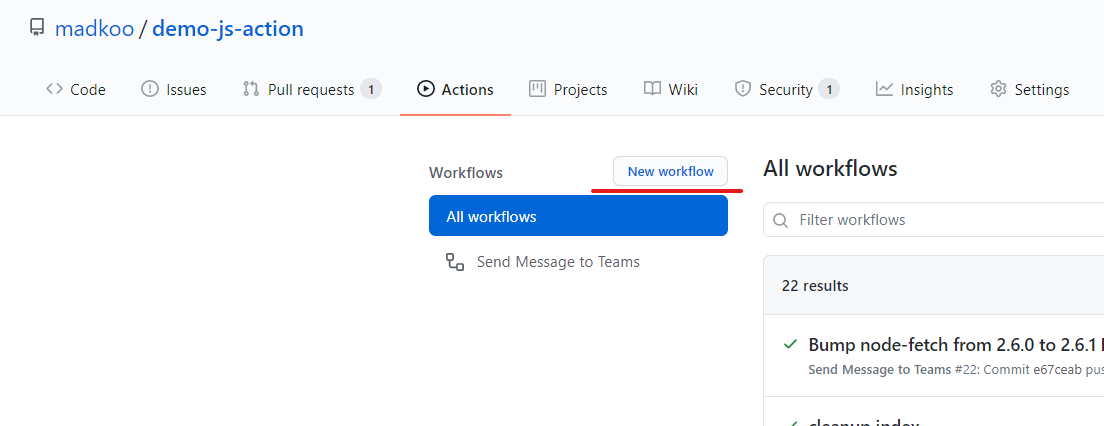
Click on New workflow or Set up a new workflow


- Copy the below yml, commit it.
{% highlight yml %}
name: “Send Message to Teams” on: [push]
jobs:
hello_world_job:
runs-on: ubuntu-latest
name: A job that sends hello to teams
steps:
- name: Hello world action step
uses: madkoo/demo-js-action@v1.1
env:
TEAMS_WEBHOOK: ${{ secrets.TEAMS_WEBHOOK }} # required
id: hello
with:
msg-to-teams: ‘Hello from GitHub’
# Use the output from the hello step
- name: Get the output time
run: echo “The time was ${{ steps.hello.outputs.time }}”
{% endhighlight %}
Once you commit the last workflow changes your workflow should run. To get it running successfuly there needs to be a webhook setup in your Teams channel to get the action to post a message to Teams. That webhook should be saved in the secrets in your repo.
Saving a secret
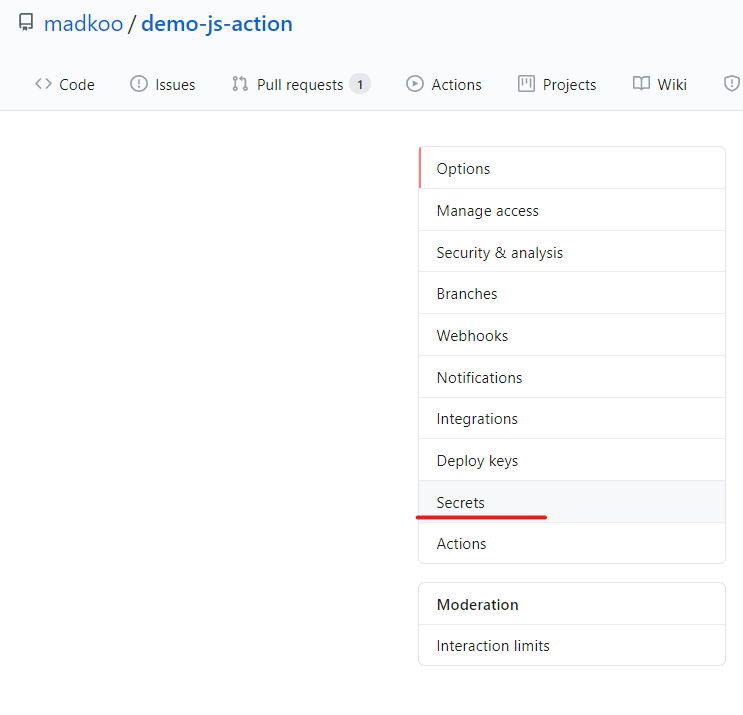
- Go to Settings in your repo

- Select Secrets in the menu

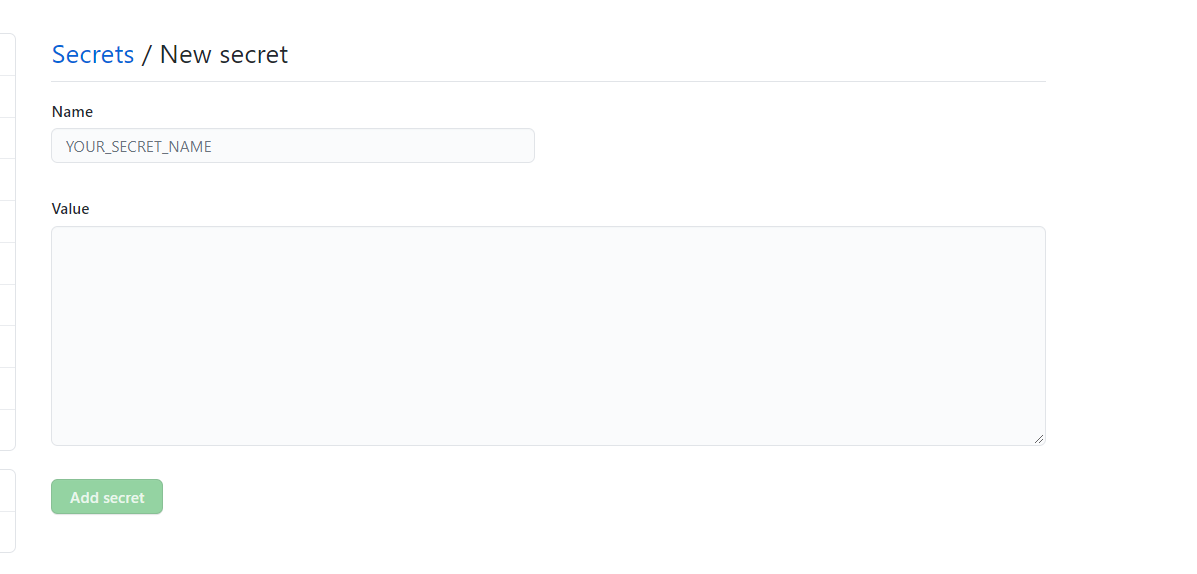
- Click on New Secret

- Give it a name TEAMS_WEBHOOK and pased the url in the description box. Savit and your done.

Now everything is setup and your action should run on every commit.
